
| Darin McQuoid | Blog | Reviews | Tutorials | River Directory |
Nikkor
135mm f/2.8 disassembly
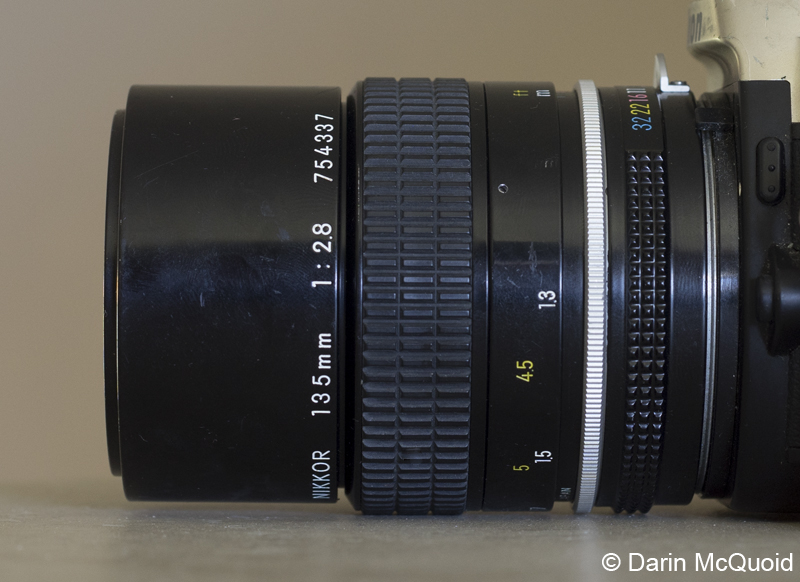
Here we have a 1977 Nikkor 135mm f/2.8 "K" version which outside the aperture ring is the same as the AI version. I could not find anything on about how to disassemble and lubricate the helicoids on this lens. My particular copy was a pain because Nikon used more loc-tite in this era or some idiot had been into the lens and applied too much to nearly every screw. Using a soldering iron to heat the screws can help, but I still ended up with two stripped heads.
It's important to have the right tools as cross type screws on lenses are Japanese Industrial Standard (JIS) not Phillips. A Phillips screwdriver will strip the heads. I suggest working on an old towel as screws bounce off hard surfaces if dropped, and are too easily lost.
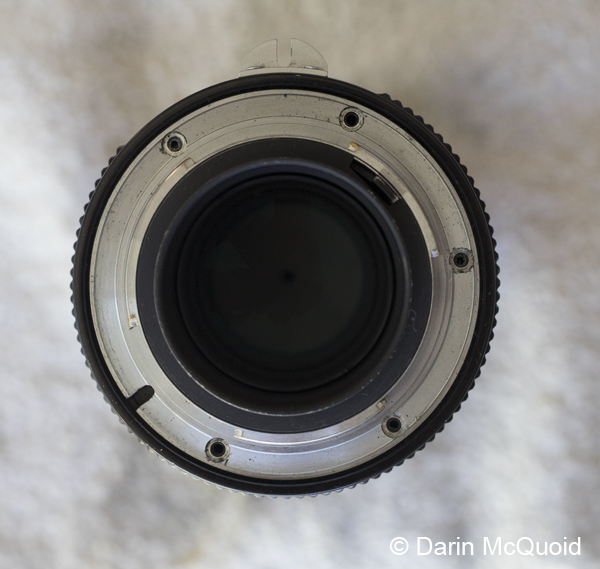
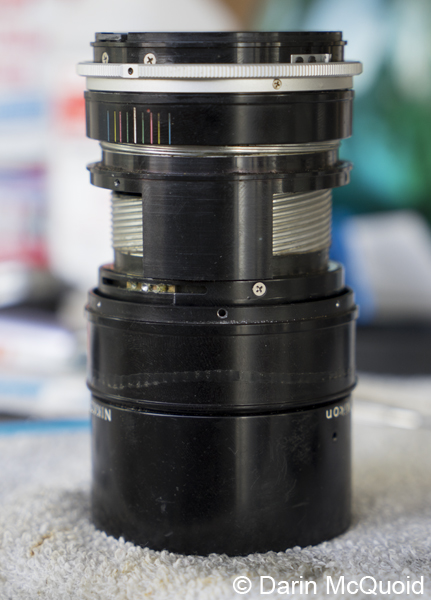
First remove five JIS
screws from the
rear lens mount, lift it out and set aside.
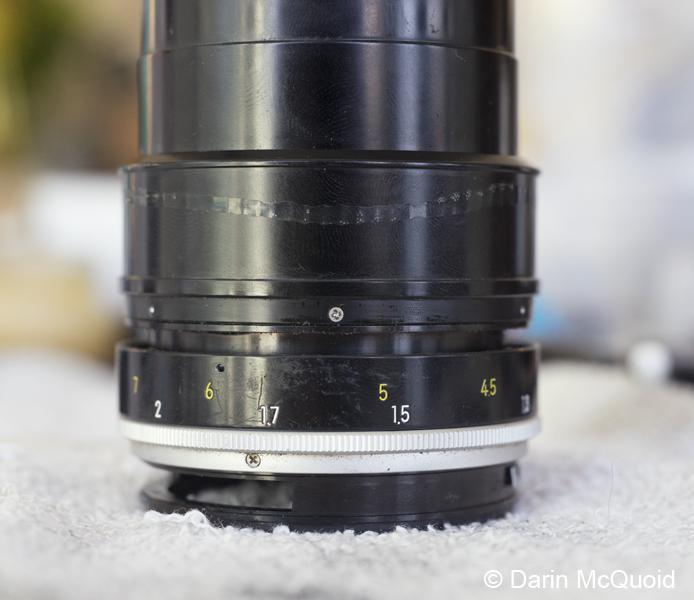
Remove two black JIS screws on aperture ring, lift off aperture ring and set aside.
Remove two black JIS screws on aperture ring, lift off aperture ring and set aside.
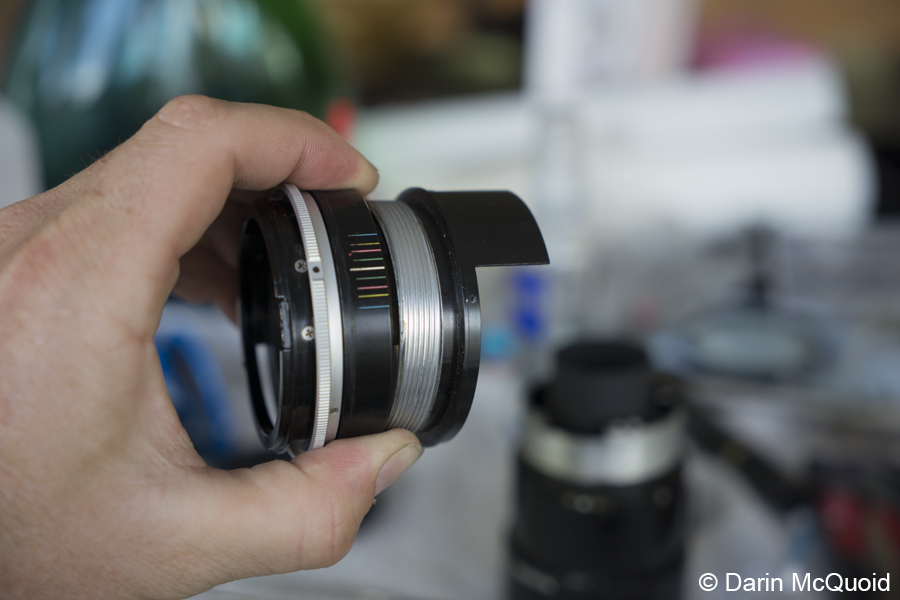
On the left you can see
the fork that
attached to the aperture ring by the screws we just took out, it
couples to the aperture by the small prong in the middle of the
picture. Pull it into the slot it slides in and ignore for now.
Here you can see I
removed the rubber
focusing grip hoping that it would come apart like the 105mm f/2.5. No
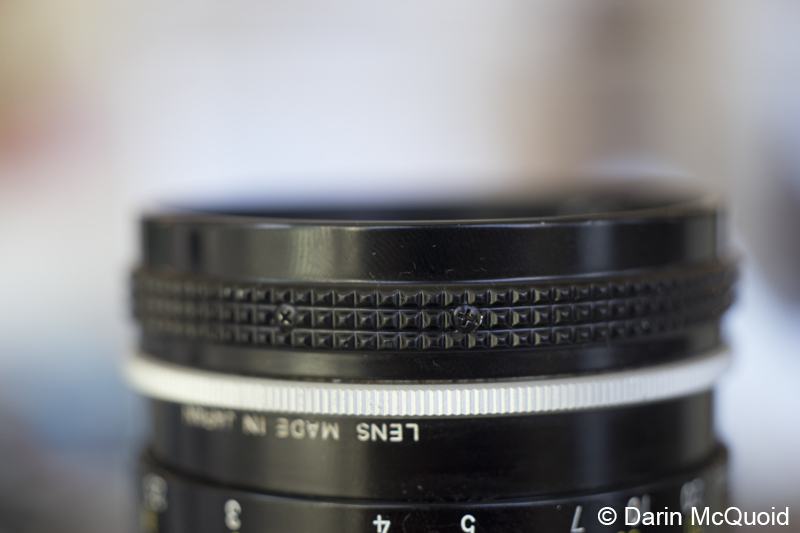
need to remove it on this lens. Instead, remove three slotted set
screws in the distance scale ring.
With the screws removed the focusing ring is loose. Extend the built in hood and pull the focusing and distance scale rings down towards the hood to reveal the infinity focus stop.
Before removing the infinity focus stop I deemed it prudent to scribe it's location in case it moved once loose. You can see the dry focusing helicoid and stripped center screw on the infinity stop. Now remove the infinity focus stop.
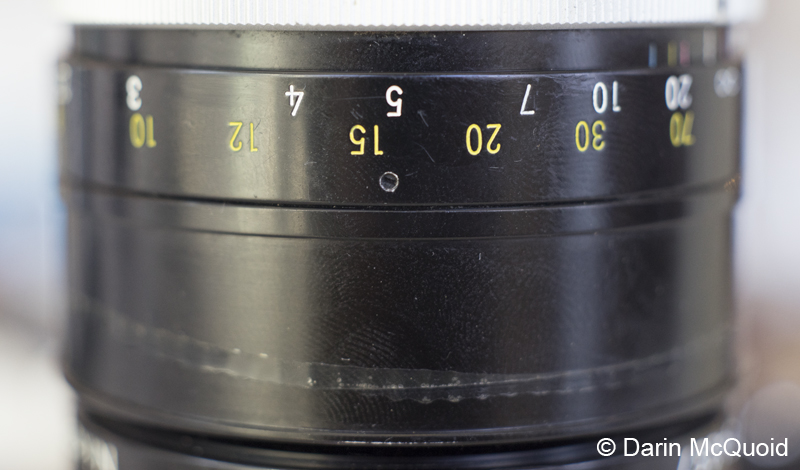
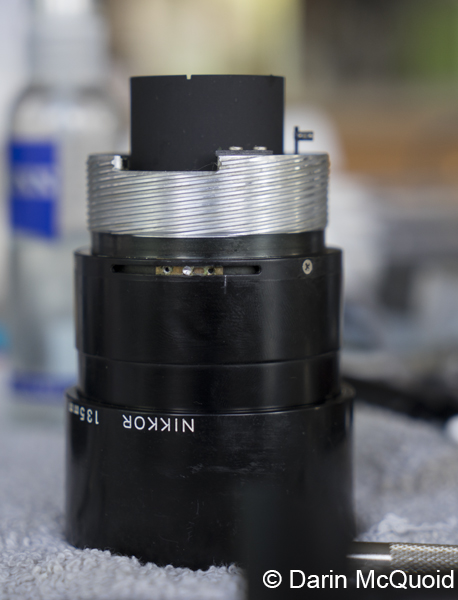
Pull the distance scale
ring back to
reveal three JIS screws on the focusing ring. Remove and set aside.
With the screws removed the focusing ring is loose. Extend the built in hood and pull the focusing and distance scale rings down towards the hood to reveal the infinity focus stop.
Before removing the infinity focus stop I deemed it prudent to scribe it's location in case it moved once loose. You can see the dry focusing helicoid and stripped center screw on the infinity stop. Now remove the infinity focus stop.
Now we're to the point of
no return. Slowly
unscrew the inner focusing helicoid (the one with the big
tab
that hits the infinity focus stop). Go slow while pulling
the inner helicoid away from the front body with constant
pressure. It's very
important
to know where the focusing helicoid separates, because it needs to be
threated back on in the same exact spot or focusing will be off when
reassembled.
Mine comes apart just past
where the
left side of the tab passes the infinity stop.
Next we split the outer helicoid. The helicoid with the tab unthreads from the outer barrel, as before go slow while pulling apart and note where it comes apart.
Clean all helicoid threads and apply grease of choice. I use denatured alcohol, a toothbrush and paper towels to clean the threads.
Next we split the outer helicoid. The helicoid with the tab unthreads from the outer barrel, as before go slow while pulling apart and note where it comes apart.
Clean all helicoid threads and apply grease of choice. I use denatured alcohol, a toothbrush and paper towels to clean the threads.
Reinstall outer helicoids.
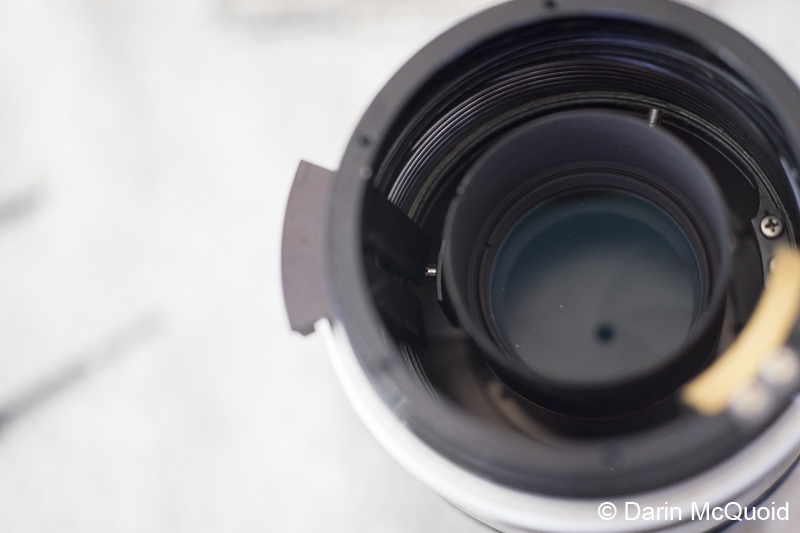
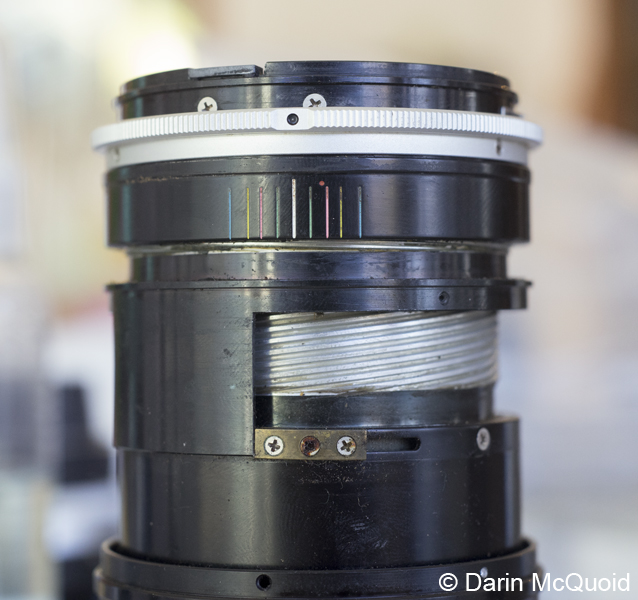
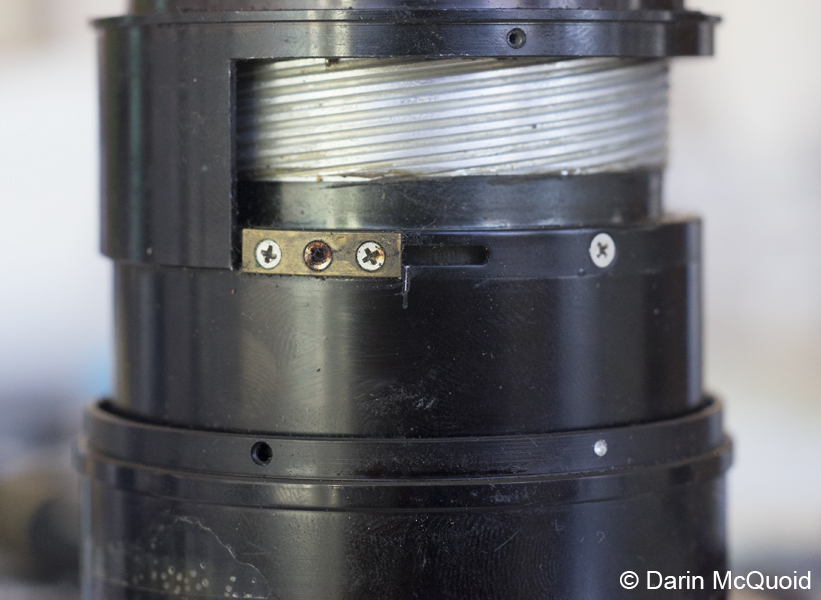
When putting
together the inner helicoids it's critical to line up the big brass key
into the slot just wide enough for it. This is done by adjusting the
outer helicoid while starting to thread on the inner helicoid to the
front half of the lens. Arrows show the slot just wide enough for the
key. Once the threads have started and the brass key is in place align
the aperture fork that was unscrewed earlier to the corresponding
prong. (neither pictured below)

Thread helicoid on and
install the brass
infinity focus stop. Install focusing and distance scale rings,
checking to make sure the infinity focus mark lines up
correctly.
If it doesn't, the inner helicoid was installed in the wrong thread.
Install aperture ring and two JIS screws to the fork. Install
rear lens mount and check to see that infinity focus is correct on a
camera. Hopefully infinity focus looks good and it's time to celebrate
with a beverage of choice. On the other hand if it's off optically but
lines up on the distance scale ring, the outer focusing helicoid is
threaded incorrectly.
For lubrication I've been
using CRC
White Lithium Grease in a spray can. I spray
it in a jar and let the carrying agents evaporate overnight. It seems
to be the right viscosity lubricant for AI and earlier lenses, but too
thick for AI-S. I thin it to taste using 3 in 1 oil.
HTML
Comment Box is loading
comments...