
| Darin McQuoid | Blog | Reviews | Tutorials | River Directory |
Nikkor-n
24mm
f/2.8 disassembly
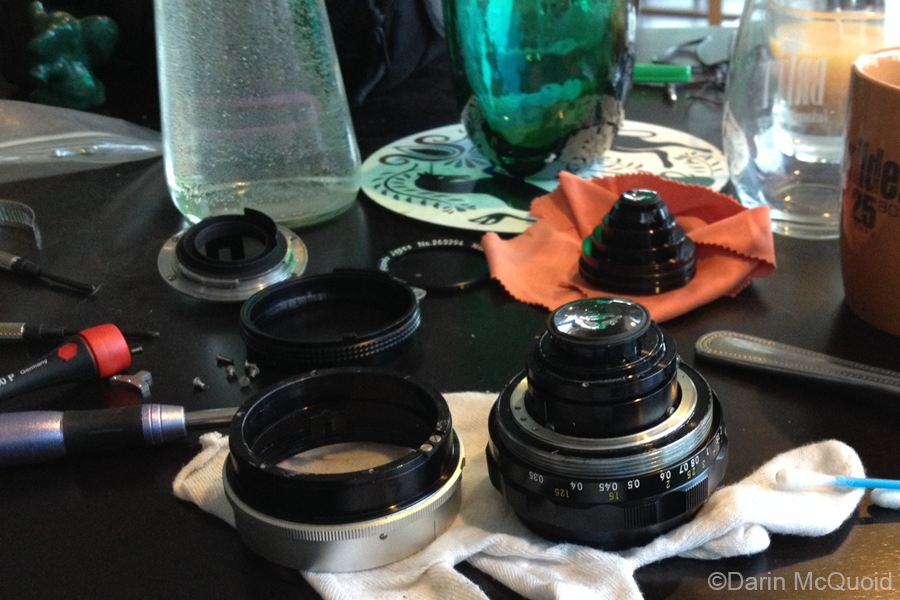
It's not shocking that a lens this old needs the focusing ring lubricated. This particular copy was made somewhere between 1967 and 1971, making it forty-two years old at the youngest. I could find no information available online for repairing this lens, and thought I'd share what I learned as it has some hidden tricks. This is Nikon's first lens with Close Range Correction. I did not split the inner focusing helicoid and have heard it's a nightmare to put back together - you really need to know what you're doing. As you can see above I also removed the front element group which is not necessary for servicing the focusing helicoids. What grease to use is up for debate. Some ebay sellers actually have some of the original Nikon greases. Contrary to popular belief not all Nikkors focus the same. Generally AI lenses are stiffer than AI-S, and in my experience Pre-AI lenses are all over the place because many were serviced during AI conversion. Theoretically by choosing the right grease you can have your lens focus more like an AI or AI-S lens, depending on your preference. These are just tips from my experience on this lens and assume you have the right tools like JIS screwdrivers and some basic knowledge of what's trying to be accomplished.
- Remove the lens mount by unscrewing five slotted screws. These may have loc-tite and need to be heated with a soldering iron before removing.
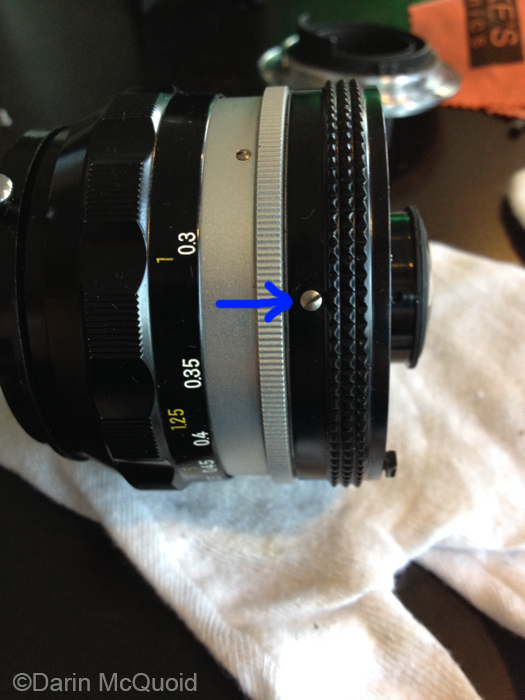
- Remove the small slotted screw on the side of the aperture ring and slide the aperture ring off after removing. This is very different from AI-S lenses, as this screw actually connects the aperture ring to the aperture control. More on this later.
This
screw both holds the aperture ring in place and connects it to the
aperture.
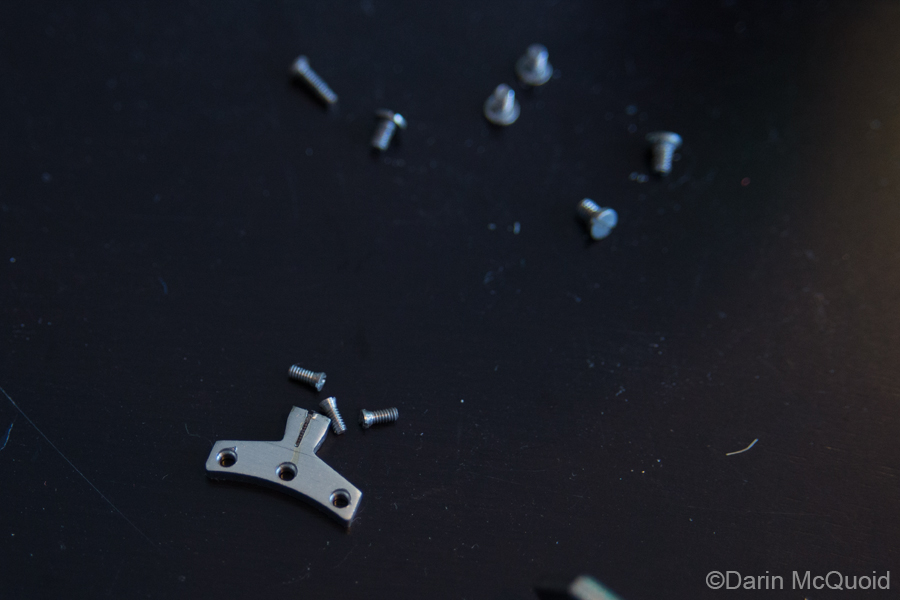
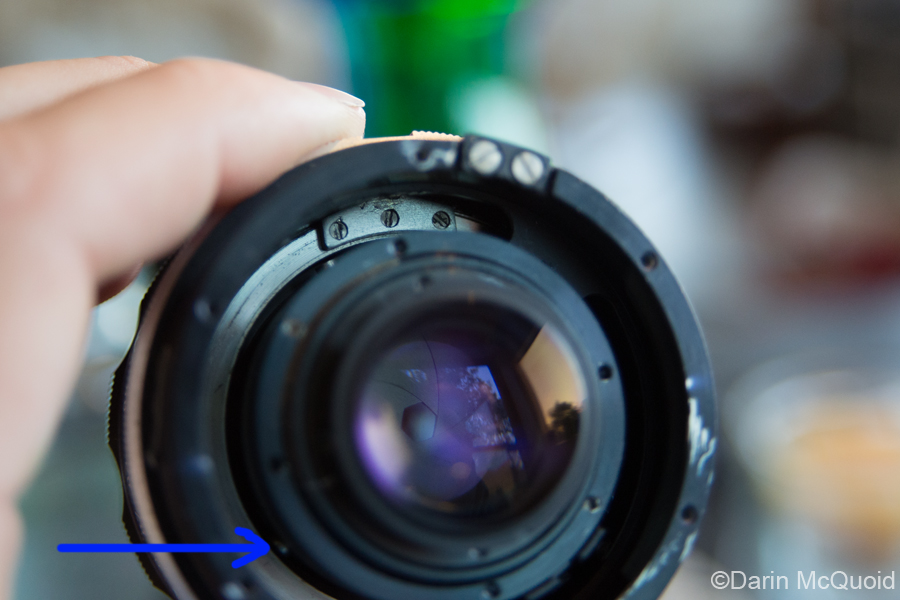
3. This is where I ran into a wall, and started
poking around trying to figure out how to separate the outer focusing
helicoid. Inside the lens is a metal tab held in place by three slotted
screws. This metal tab physically stops the lens from focusing past
minimum and infinity focus. Depending on how the focus and aperture are
set it's often hidden by a black sliding metal piece that can be pushed
out of the way. Remove the three small slotted screws and tab.
To the right you can see the metal slider pushed off to the side.

Physical stopper for the outer focusing helicoid.
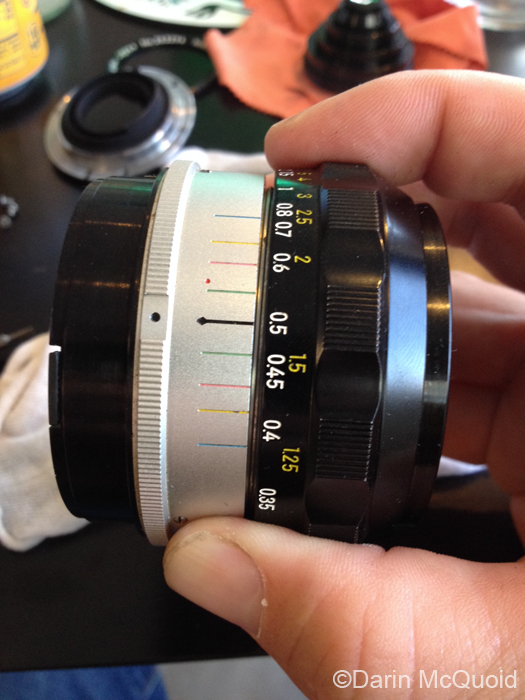
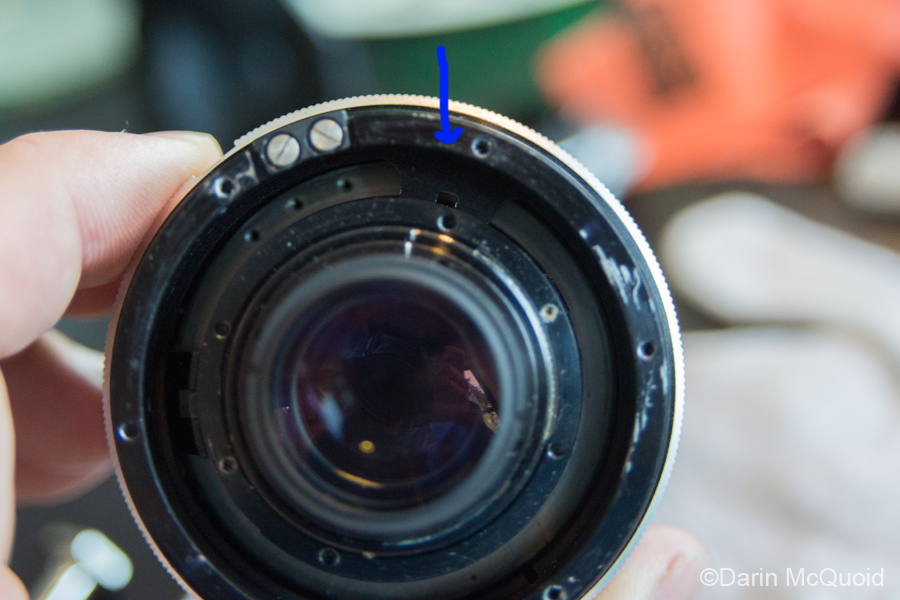
Now slowly unscrew the focusing helicoid by turning the focusing ring clockwise. Go slow while pulling the focusing ring away from the body of the lens. It's very important to know where the focusing helicoid separates, because it needs to be threated back on in the same exact spot or focusing will be off when reassembled.
I took pictures along the way as I progressed. Here you can see the helicoid threads showing, and my particular copy came apart with the infinity mark matching the depth of field scale. A good way to mark the separation point is with pieces of tape on each part.
Once the lens is
split...if you don't know what you should do next, you
shouldn't be doing this at all :) Just expose the inner
helicoid threads to work the grease in, and be sparing with the grease
on the outer helicoid threads. Now things are going to get a little
more complicated.
Thread the focusing ring / outer helicoid back on where marked. It's counter-clockwise to thread on. Just get it started, don't put it all the way on. Locate the aperture adjustment levers. That's right, on this lens there are two aperture adjustment levers. One is wider and makes an obvious connection with the lens mount that we took off on step one. The other is a small silver screw sticking out. Using a small screwdriver you can slide both to the fully closed position. The silver screw has more friction than the wider lever.
Thread the focusing ring / outer helicoid back on where marked. It's counter-clockwise to thread on. Just get it started, don't put it all the way on. Locate the aperture adjustment levers. That's right, on this lens there are two aperture adjustment levers. One is wider and makes an obvious connection with the lens mount that we took off on step one. The other is a small silver screw sticking out. Using a small screwdriver you can slide both to the fully closed position. The silver screw has more friction than the wider lever.
Aperture adjustment
screw.
Now remember that
sliding tab fork thing that we may have had to move out of the way
earlier? When screwing the lens back together you must keep that fork
aligned over the silver aperture screw. The aperture ring screw we took
out in step two connects to this fork, thus controlling the aperture.
This has to stay aligned over the protruding silver aperture screw when threading the helicoid back together. Turn the threads a little, slide the tab over the screw, repeat until the screw is locked between the forks.
This has to stay aligned over the protruding silver aperture screw when threading the helicoid back together. Turn the threads a little, slide the tab over the screw, repeat until the screw is locked between the forks.
Once the forks hold the
aperture screw, tighten the helicoid past infinity focus. Then back it
off to infinity focus and install the silver prong from step three.
Tweezers help a lot for reinstalling this piece. Next install the
aperture ring at f/16 and the screw from step two, that will attach the
ring to the forked prong seen above. Finally line up the aperture fork
on the lens mount with the wider aperture lever, and install the lens
mount.
HTML
Comment Box is loading
comments...