| Darin McQuoid | Blog | Reviews | Tutorials | River Directory |

First, a more
natural look. Stars at Castle Lake take one.
 Nikon D700, Nikkor 20mm 2.8 at 30" F2.8 ISO 6400 The surreal look.
Stars
at Castle Lake take two.
 Nikon D700, Nikkor 20mm 2.8 @ 160' F11 ISO 200 The first natural
style is demanding on equipment. Stars tend to blur leaving mini star
trails after ten to thirty seconds (depending on your focal length).
These little star trails are too short to be interesting and too long
to feel normal. So it's necessary to have a camera with high ISO
capabilities, a fast lens, or ideally both. This is where you find that
kit lenses and most zooms just aren't up to par. F2.8 is only
marginally fast enough, and for night shooting it's ideal to have a
F1.4 lens if you have the
budget. With a 1.4 lens I'd have been able to shoot at either
8" or
drop my ISO to 1600. With an F4 lens this shot just wouldn't be
happening. In my image you can also see that the stars in the corner
are blurred due to
coma, a
common problem in fast wide lenses. You don't need a remote release for
this type of image, but you should set your camera's self timer to a 2"
delay so any shake you give it by pressing the shutter is gone by the
time the exposure starts.
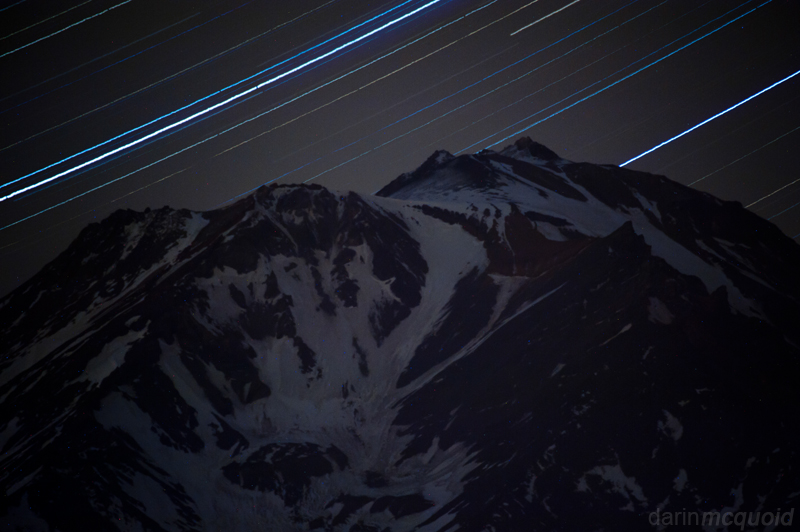
The best lens I have found for shooting still stars is actually not the most expensive: The Samyang 14mm f/2.8. It has little coma, is ultra-wide and about $1,000 less than the Nikon or Canon versions, which both have excessive coma. 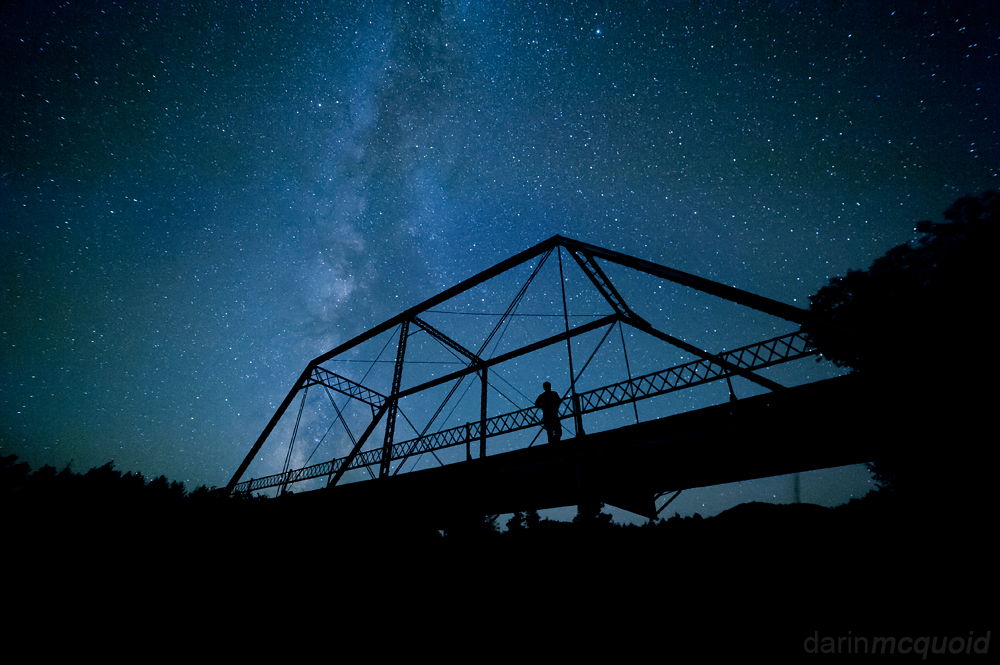 Nikon D700, Samyang 14mm f/2.8 @ 20" f//2.8 ISO 6400 There are a lot of challenges to night time photography, especially in cold weather where batteries suffer diminished life. In cold weather just a few 30" exposures can kill a battery. Getting the second image required a lot more expensive equipment than I normally use: Goal0 Sherpa 120, Sherpa UI, Aputure Timer Remote and the EH-5A AC Adapter. If you want the starts to be moving in a circular motion, point North if you live North of the Equator, and South if South of the Equator. A wide lens will also give it a more circular look, if a telephoto is used they will generally just be curved lines across the sky. The wider the lens the more you can get away with not being pointed directly North. Some obvious long
exposure
issues like hot pixels, but the curved lines idea comes across easily
at 500mm
 The big
question is calculatingg the exposure for a shot like this? I start by
taking a 30
second exposure at maximum aperture and as high ISO as need be. This
isn't a keeper shot, it is the basis for a little math. My test shot
was 30" F2.8, ISO 6400. From there it's simple math, for every step of
adjustment to the ISO and aperture, the length of exposure must be
adjusted equally. Reducing ISO 6400 to 200 is five stops. So now my
exposure time needs to double five times. 30", 1', 2', 4',
8',
16'. Then adjust the aperture; from 2.8, 4, 5.6, 8 , 11: a
four
stop adjustment. So exposure is lengthened: 16', 32', 64', 128',
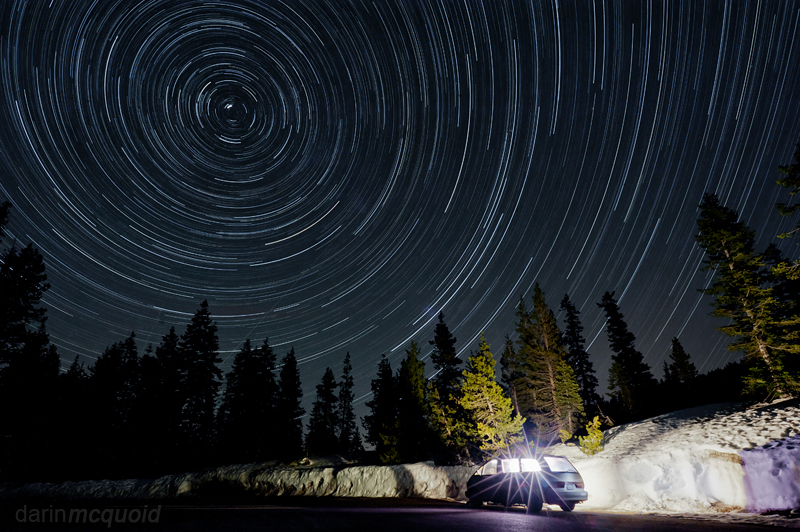
256'. My original was brighter than I wanted, so I did some
guesswork and dropped the exposure a bit under a stop: from 256 minutes
to 160. Now a two and a half hour plus exposure is going to pick up a
massive amount of noise and hot pixels, so I split it into ten separate
exposures and used the "multiple exposure" feature on the D700, which
crapped out of me, forcing me to combine the multiple exposures in
photoshop, which is quite easy to do using Dr Browns
services.
As a rule of thumb 4-8 minutes is a good exposure length for stacking long star trails. Long enough that you don't end up with a thousand images to process, but short enough to avoid amp noise and hot pixels. 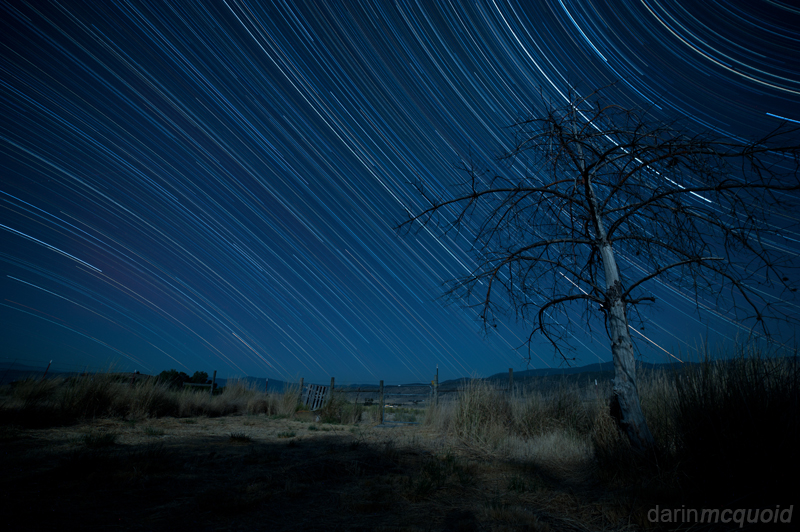 Nikon D700, Samyang 14mm f/2.8 @ 60 shots of 5 minutes f4 ISO 200 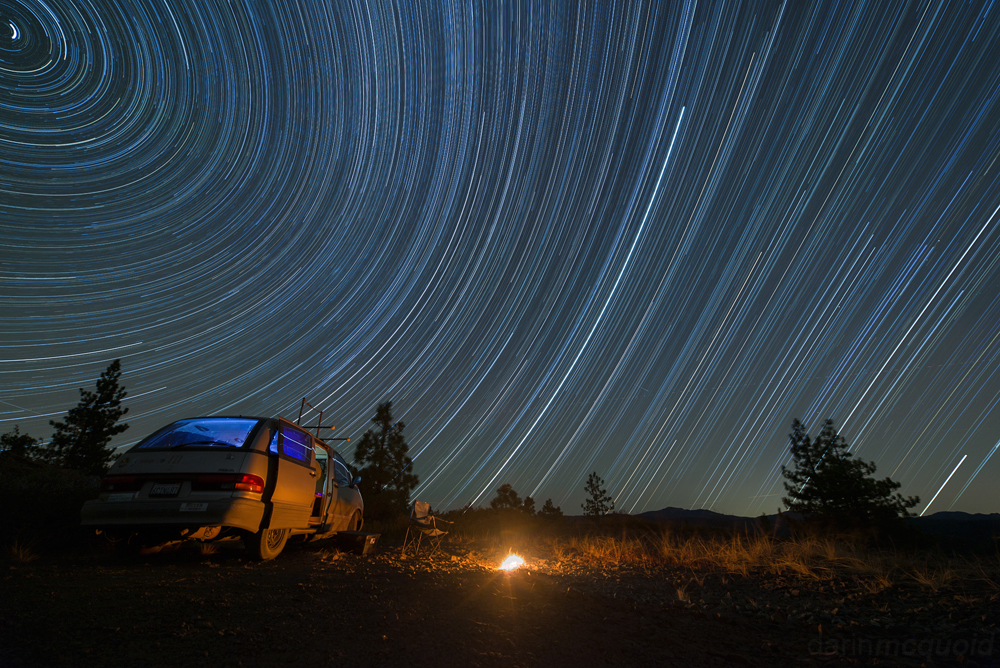 Nikon D600, Samyang 14mm f/2.8, note the lack of a nice star from the fire that you'd get with an older lens. |