
| Darin McQuoid | Blog | Reviews | Tutorials | River Directory |
Whitewater
Photography Tutorial #7: Composition.
I approach
photography on the river
in different ways. I always bring a camera. Quite often I'll only shoot
rapids we are scouting or portaging. Even if there is no reason to get
out of the boat I keep my eyes open
for good light
or different angle. If something special is happening with the light
I'll ask to stop. Thankfully most of the people I paddle with are very
understanding.
Daydreaming during dry spells I'll think of shots that might work on my favorite rivers and write them down. This leads to another mode getting one or two planned shots at locations noted on previous trips. I like to warn people that I'll want to stop for one or two shots during the run. For these shots I'll often bring a specific lens I woudn't normally carry.
Kayak photography is about telling a story through the photo. The story I like is suspense. What's about to happen? Where is he going? I also love the beauty of rivers and natural landscape. Because of this I often shoot from behind. From behind we see the the kayaker first, then look at where they're going. From the front it's generally the reverse and harder to connect with the subject of the photo; the kayaker.

Sony A99, Minolta 17-35mm f/2.8 @ 24mm 1/800 f/5.6 ISO 400
Nikon D600, Nikkor 24-85mm VR @ 40mm 1/800 f/4 ISO 800
Here the obvious
seam of rock pulls
the eye to Yoshi Takahashi on Upper Cherry Creek.

Sony NEX-6, Nikkor 85mm f/1.8G @ 1/1000 f/1.8 ISO 100
Daniel Brasuell
framed by the
foliage in Japan. Yes I'm ignoring my own
guide with busy
foreground.
Sony NEX-5N, Nikkor-S 5.8cm f/1.4 @ 1/1250 f/2.8 ISO 400
Rok Sribar on the Rio Baker in Chile.
Nikon D600, Tamron 28-75mm f/2.8 @ 1/640 f/5.6 ISO 400
Note how many of these images have water flowing up from the bottom and winding into the distance. Like the classic road diminishing shots, it pulls you in on the San Joaquin River in California.
Nikon D200, Nikkor 28mm f/2.8 @ 1/1000 f/5.6 ISO 100
Next Up: Wide Angles.
Whitewater Photography Tutorial #1: Intro.
Whitewater Photography Tutorial #2: What is the right exposure?
Whitewater Photography Tutorial #3: Getting the right exposure.
Whitewater Photography Tutorial #4: Low Light Action
Whitewater Photography Tutorial #5: Focus
Whitewater Photography Tutorial #6: Basic Lighting
Whitewater Photography Tutorial #7: Composition
Whitewater Photography Tutorial #8: Wide Angles
Whitewater Photography Tutorial #9: Panning
Whitewater Photography Tutorial #10: Post-processing
Whitewater Photography Tutorial #11: Sequencing
Daydreaming during dry spells I'll think of shots that might work on my favorite rivers and write them down. This leads to another mode getting one or two planned shots at locations noted on previous trips. I like to warn people that I'll want to stop for one or two shots during the run. For these shots I'll often bring a specific lens I woudn't normally carry.
Kayak photography is about telling a story through the photo. The story I like is suspense. What's about to happen? Where is he going? I also love the beauty of rivers and natural landscape. Because of this I often shoot from behind. From behind we see the the kayaker first, then look at where they're going. From the front it's generally the reverse and harder to connect with the subject of the photo; the kayaker.
- The best shot is never from your boat and rarely from river level. Getting a good angle requires hiking.
- There should be some empty space in the image. This gives the subject room to breath. That room to breath should generally be in front of where the kayaker is going. By giving the subject room to move into you're giving them the future to move into and creating a sense of drama with the unknown. If there is space behind them it's obvious they already made it through that section - no drama.
- Don't tilt the camera to make a drop look steeper than it is, this is always obvious and looks tacky. Ditto fake tilt-shift effects in photoshop.
- If you have the time, shoot a lot. Try a different angle or zoom setting for every person that runs the rapid. It's a quick way to learn a lot about what works.
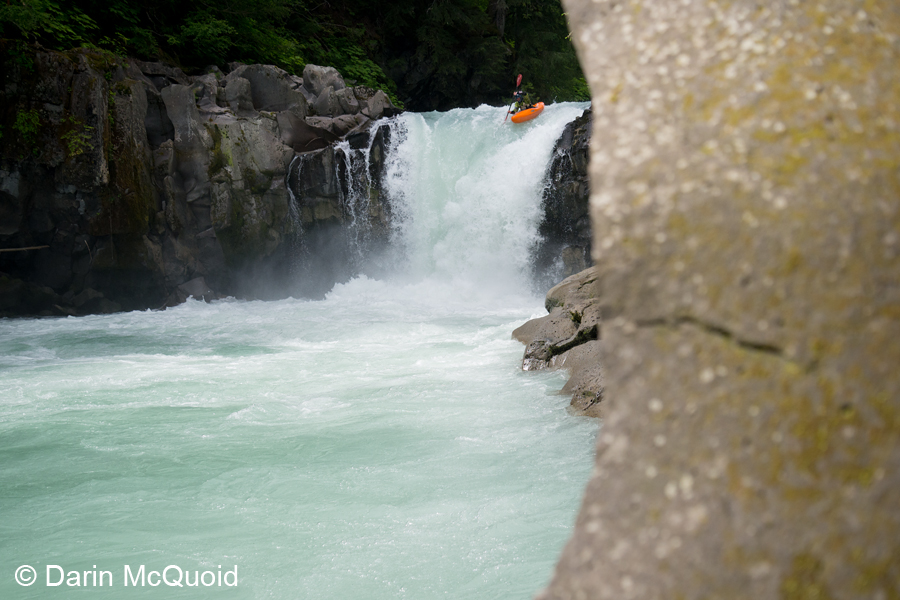
- To maximize the height of a drop, shoot from downstream but standing at the same height as the lip of the rapid/falls. This tends angle tends to be a little over used, but you can keep it creative by avoiding the cliche of cropping to just the drop.
Level with the
lip shot of Craig Kleckner, but zoomed out enough to get some of the
environment on the McKenzie River in Oregon.
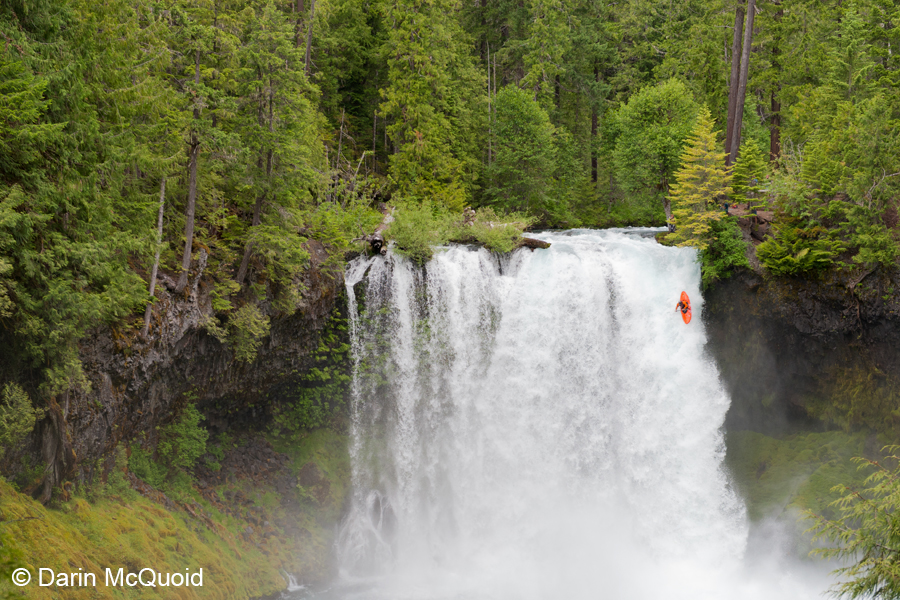
Nikon D700, Nikkor 70-200mm f/2.8 @ 1/1000 f/4 ISO 800
Nikon D700, Nikkor 70-200mm f/2.8 @ 1/1000 f/4 ISO 800
- Don't be distracted by just the rapid. Take in some of the scenery too, the beauty of river canyons is what first attracted me to whitewater, and something that can be shared by all viewers.
- The rule of thirds is one of the most well known. I'm really not a big fan of it. In general I just try to keep the subject out of the very center of the image, but this can be up to interpretation because in a whitewater photo, just what is the subject, the scenery or the paddler?
- Wide angle lenses are not about taking it all in. They are about getting close to your subject and still capturing the environment.
I'm about seven
feet from
Thomas Moore while shooting this photo on South Silver in California.
Sony A99, Minolta 17-35mm f/2.8 @ 24mm 1/800 f/5.6 ISO 400
- I try to look for a fairly even mix of dark, light and medium tones in the composition.
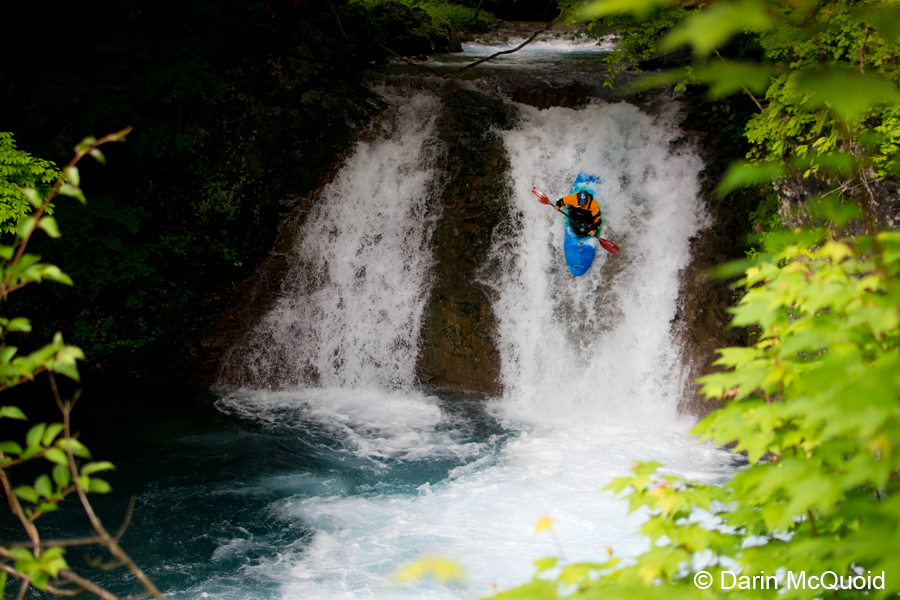
- Classical advice for photography says to avoid objects in the foreground, but photographs are a 2d rendition of a 3d subject. I like foreground objects because they give depth, but try to avoid anything busy like bushes or tree limbs.
It
doesn't have to be a big waterfall. Daniel Brasuell on Callaghan Creek,
British Columbia.
Nikon D600, Nikkor 24-85mm VR @ 40mm 1/800 f/4 ISO 800
- If you repeat runs often, go for quality over quantity. Try to visualize what a compelling an image on that river might be. Plan to skip the shots you already have and spend some extra time hiking for one unique shot, or leave room in your camera bag for an uncommon lens.
On Upper Cherry in
2009 I
brought a rarely used super wide lens, and most of the shots from the
trip didn't work well, but this one of Garrett Brown did.

Nikon D200, Sigma 10-20mm @ 10mm 1/750, F8, ISO 200
Nikon D200, Sigma 10-20mm @ 10mm 1/750, F8, ISO 200
- Look for lines. The human eye likes to follow lines and there are different types of lines.
Sony NEX-6, Nikkor 85mm f/1.8G @ 1/1000 f/1.8 ISO 100
- Frame with the natural surroundings. One of the keys to good photograph is not only a compelling subject, but that a composition that doesn't allow the eye to wander off the image.
Sony NEX-5N, Nikkor-S 5.8cm f/1.4 @ 1/1250 f/2.8 ISO 400
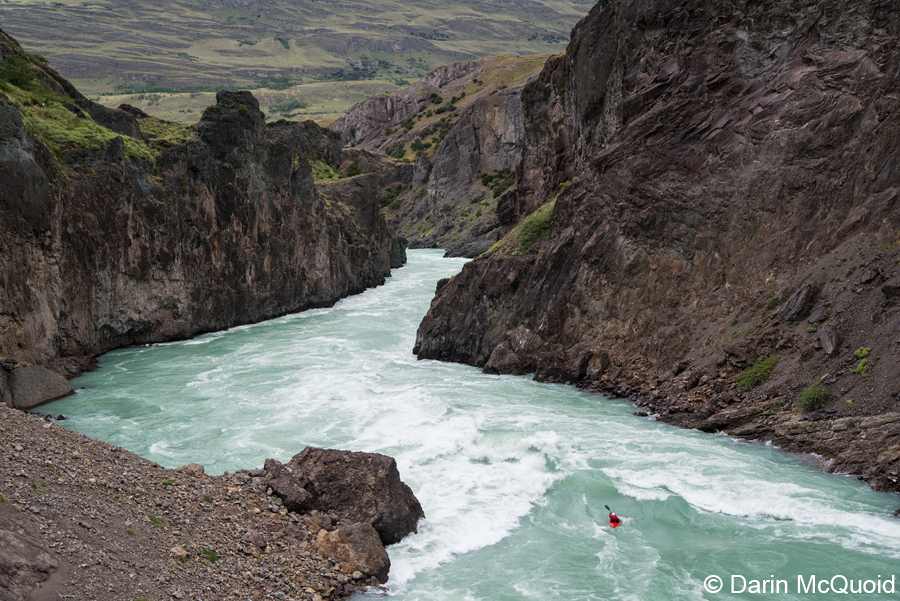
The best images
are a combination
of elements. While the whitewater in this shot has nothing in common
with the
above image of Garrett Brown on Upper Cherry, photographically they are
strikingly similar. A wide path of water starts at the bottom of the
image and flows to the center, narrowing as it goes, drawing the eye
in. This is helped by the darker rock framing the whitewater.
Rok Sribar on the Rio Baker in Chile.
Nikon D600, Tamron 28-75mm f/2.8 @ 1/640 f/5.6 ISO 400
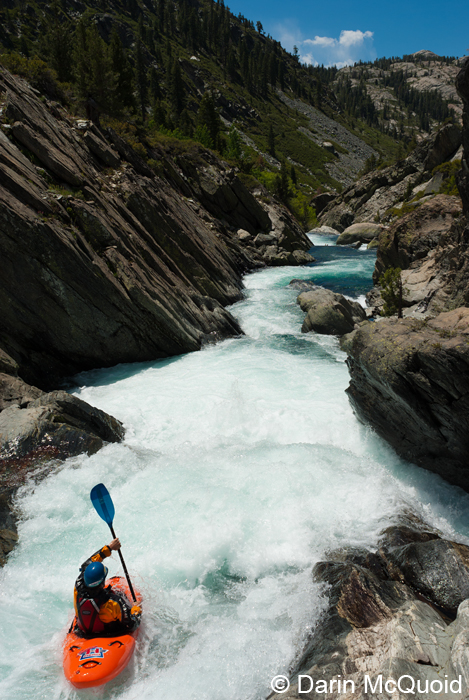
Note how many of these images have water flowing up from the bottom and winding into the distance. Like the classic road diminishing shots, it pulls you in on the San Joaquin River in California.
Nikon D200, Nikkor 28mm f/2.8 @ 1/1000 f/5.6 ISO 100
Next Up: Wide Angles.
Whitewater Photography Tutorial #1: Intro.
Whitewater Photography Tutorial #2: What is the right exposure?
Whitewater Photography Tutorial #3: Getting the right exposure.
Whitewater Photography Tutorial #4: Low Light Action
Whitewater Photography Tutorial #5: Focus
Whitewater Photography Tutorial #6: Basic Lighting
Whitewater Photography Tutorial #7: Composition
Whitewater Photography Tutorial #8: Wide Angles
Whitewater Photography Tutorial #9: Panning
Whitewater Photography Tutorial #10: Post-processing
Whitewater Photography Tutorial #11: Sequencing
Comment
Box is loading comments...